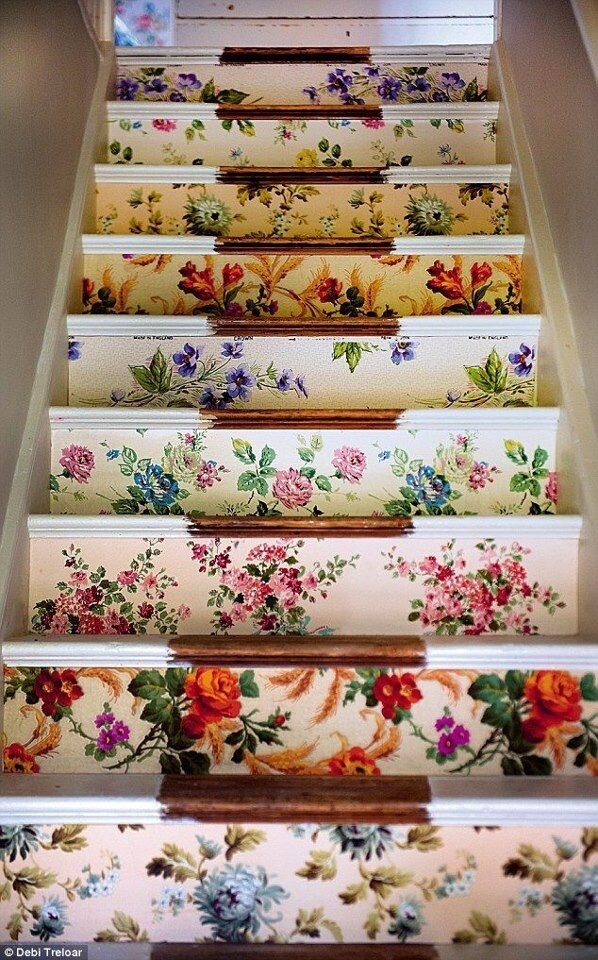
Floral Stairs
A floral staircase... who would've thought it would be so cute? I love this DIY idea from Sarah Moore's book Vintage Home: Stylish Ideas and over 50 Projects from Furniture to Decorating.
 (image by Debi Treloar)
The book looks great, and I am definitely planning to check it out to see if I can spot any handy hints or fun DIY projects for my own home.
What I like about this project is that you can apply the same idea to different styles.
So here, Sarah has used really pretty, dainty vintage floral papers to add a feminine edge to the stair risers. Them she has left the stair treads unpainted, using the half-painted finish to create a cute DIY, rustic feel. If you go for more of a contemporary feel at home then you could use geometric papers in white/grey and finish with a gloss white tread, to create a more minimal look.
I'm imagining some fab 60's/70's wallpaper designs in mustards & golds. Lovely!
Here are the steps Sarah gives in her book, with my notes added in italics:
DIY Decorative Staircase
You will need:
Sounds easy enough! Thanks Sarah for this fun DIY.
What design would you go for?
Becky
 (image by Debi Treloar)
The book looks great, and I am definitely planning to check it out to see if I can spot any handy hints or fun DIY projects for my own home.
What I like about this project is that you can apply the same idea to different styles.
So here, Sarah has used really pretty, dainty vintage floral papers to add a feminine edge to the stair risers. Them she has left the stair treads unpainted, using the half-painted finish to create a cute DIY, rustic feel. If you go for more of a contemporary feel at home then you could use geometric papers in white/grey and finish with a gloss white tread, to create a more minimal look.
I'm imagining some fab 60's/70's wallpaper designs in mustards & golds. Lovely!
Here are the steps Sarah gives in her book, with my notes added in italics:
DIY Decorative Staircase
You will need:
- A tape measure
- Pencil
- Metal ruler (You can get 60cm ones which are great for this sort of project)
- Thick card for template
- Scissors or craft knife and board (I recommend a craft knife for ease of use. Just make sure it's sharp and take care!)
- Selection of vintage papers
- PVA glue and brush
- Clear acrylic varnish
- Measure one of the risers in the middle of the staircase and use the dimensions to create a card template using scissors or a craft knife and board. Check that this fits on all the steps – the first and last often vary slightly. (In an old house, like mine, lots of them vary! Test each riser to get a good finish)
- On the back of your wallpaper, draw around the template, then cut out the pieces. Measure and cut out any risers that vary from the template.
- Make sure the stairs are free of dust and any loose particles, then paint one riser at a time with a thin layer of PVA glue and smooth the paper in place. Push out any air bubbles or creases towards the edge of the stairs. Pay particular attention to the edges, ensuring that they are glued in place. (My tip is to stick the middle of the paper first, smoothing out to the edges - this will help to minimise bubbles)
- Wait until the glue is totally dry, about 24 hours, then cover the surface of each riser with a light coat of clear acrylic varnish to protect the paper.
Sounds easy enough! Thanks Sarah for this fun DIY.
What design would you go for?
Becky

Customer Comments
No one has left a comment yet, why don't you be the first?